Check one thing off the Christmas "to-do" list (almost): the family photo card is completed. In the time I had yesterday afternoon, I cranked these out. I like how the photo looks with the color scheme. I included a self-tying bow (one without a knot at the base and which has little to no waste), attaching each with a glue dot. I want to write a short synopsis of the year to attach to the back, but this and addressing the envelopes, which are also stamped, will complete the project.
I'm trying to kick back a bit tonight and breathe, but it's hard. I have letters to cut for a bunch of dvd tins I was contracted to make. The addition of the initial really completes the look, thought, so I'm glad to do them.
I also am hosting the dinner portion of a progressive dinner Sat. night, and I want to get some (I'm not going to kill myself, trust me!) decorations out and clean the house a bit. (At dinner, Bob broached the subject of not putting up the Christmas tree this year, and Michael's response was "atheism". I think this was his 13-year-old way of saying "heresy"!, so I guess we'll be putting it up at some point. Call me Scrooge, but it seems sort of pointless when we're not here for the week of the holiday.) Bob will help, so I guess all that can happen tomorrow night and Sat. afternoon after I work. I know, I know--BREATHE!!! I'm tryin'!
Thursday, November 29, 2007
Wednesday, November 28, 2007
Order Restored
This is more like it! The carpets look much better and the rooms are back to serving as public living spaces, instead of storage lockers. Thanks to those who offered words of advice and support during my spaz attack. I'm still feeling edgy and whelmed by life, but I'm investigating ways to cope and infuse margin into each day. Prayer is a great suggestion, and I am doing that. If I come to mind, you know what to ask for on my behalf--peace!
While everything was out of my craft room, I took the opportunity this presented to do some organizing. I got rid of some things, put some things away, found new homes for other stuff, and generally tidied up. The main physical change made was to the location and height of the table I use to stamp and design.
I have been having trouble with pain in my neck and shoulders after periods of crafting, so Bob suggested raising the work surface on my drafter's table to its maximum height. This means that I stand instead of sit to work, but it's helping. I find that I'm not as sore. The only problem with this setup is that there's a slight angle to the surface. I am using a grippy shelf liner on the surface to address the issue of sliding stamps, and I'm finding this works well.
The station to the left is my cutting surface and the new, temporary home for my ink pads. After Santa comes, I will have one place for all my pads and reinkers and markers. I can hardly wait!! I moved my punches to the top of my work surface, and they're nice to have within reach.
To the left of my cutting station is a new area I've created for projects in process. I have several of the DVD notebook tins to complete for customers, and the elements of our family photo Christmas card were there until I worked on them this afternoon. I hope this will help me know where to go when I'm looking for something!
On the opposite side of the room from those two tables is the new home for my storage tower that holds all my stamp sets. Yes, all my sets that are current are in that tower! I'm very selective about what I buy. The thing I'm most excited about over here is the sewing machine! About 10 years ago, my MIL decided she wanted a sewing machine to do simple alterations and hems, etc., but she didn't do it as much as she thought she would, so when they moved recently she asked if I wanted it. Bob can't understand why he had to haul it home from IL, but I'm looking forward to playing with it and seeing what kind of stitching I can add to my cards. This is all the rage now, if you're not aware, and thanks to Carol, I can experiment!
Tomorrow I'll show you what I worked on this afternoon.
Monday, November 26, 2007
Like a Deer in Headlights...
This is what my house looks like this morning. The contents of our bedroom, my craft room, and Michael's bedroom are all in the main living spaces of the house because we're having the carpeting cleaned. AACK! I HATE clutter and disorganization, and it has me all riled up inside.
Thanksgiving was a bit of a blur--I worked at Starbucks for 6 hours that day--and I've been working every day since. I really don't mind hard work, but this chaos, although temporary, feels like a foreshadowing of how life is going to be in the coming month. Work, festivities, Christmas cards, projects, maintaining the household, all seem to be coming down the proverbial pike en masse, and I'm like a deer in headlights.
I don't like this. As they say, somethin's gotta give. Right now, I don't know what that is. I want to take time to enjoy the holiday season--try to make some memories with my family, other than barking out orders for where we need to be next or what we need to get done. That's what I seem to do when I'm out of sorts internally, I get snippy. I'm trying to create some sort of order externally, when I really need to find a way to address what's going on inside.
All this to say, there may not be many posts in December. I'm hoping to get a grip, but if I don't, I'm asking in advance for grace. If you have any suggestions, I'm all ears. Right now, though, I gotta run--work in 30 min. One good note: it's raining!!
Wednesday, November 21, 2007
Two-Step...not what you think
In honor of the slower pace of the holiday, I'm posting a long post. Grab a cup of your favorite beverage and find a comfy spot. Trust me, this is worth the read! You've got to see this.
It all started sometime ago when I stumbled across the blog of Nichole Heady, an amazingly talented stamper who started her own company, Papertrey Ink. I was stunned--I mean jaw-droppingly stunned-by this woman's creativity, and when she opened her cyber doors for business earlier this year, it was quickly apparent to me that I was not the only one who thought this way about what Nichole had created. So, after stalking her blog and watching longingly as each new set was revealed, I asked my dear mother-in-law to get me a gift certificate for my birthday. I wanted in on the hype, and I was not disappointed. This post will show you what goodies I purchased and how they're used.
After much pondering of all the options, I finally decided to purchase the latest release, Spiral Bouquet. My box arrived yesterday, and when I opened it, this was the first thing I saw. Awwww...who doesn't like pretty?
What was enclosed was a small set of acrylic blocks which I was going to use to hold my stamp images. What, you say? These aren't wooden rubber stamps? Nope.
These stamps are made of clear acrylic that clings to the surface of the blocks without any special adhesive. Since both are see-through, making sure the image is fully inked and placing it right where you want it is supposed to be easy peasy lemon squeezy. Well, I was about to find out.
After following the stamp prep instructions so that I would be set up for the best possible experience, I was rarin' to go. I peeled up the first stamp and placed in on the block. I loved that I could put it just where I wanted on the block.
See how easy it is to see where the ink is?
Here's where the two-step comes in (no honky tonk music, please). All of Nichole's designs have multiple layers, so that you can create depth and dimension and different looks with just one set of 24 images. That girl thinks of everything! Anyway, it may be a little challenging to see in this photo, but I've inked up a thicker "shadow" image and I'm hovering it right over the line art image I stamped earlier. What a wonderful thing to be able to easily see where to align it so that it goes where I want it to go!
Here's another photograph that shows me adding a little twirly accent piece and being able to attach it to the original stem because I can see the stem while I'm stamping! You can also see how the flowers have two layers--a detail and a solid base.
Here's the finished product! I can't wait to send it to my mother-in-law! Thanks for making this fun possible, Mom!!
Here's another one I did yesterday with the same set. Isn't that fern leaf detail cool? And the sentiment, "with Gratitude", is one of several, and they're all that beautiful! The "with" and the "Gratitude" are separate stamps, so I can determine where I want them to go in relation to each other. Cool, huh!
For those who may be worried about my loyalties to SU!, let me put your mind at ease and share that Papertrey Ink does NOT have demonstrators, so I'm not going to jump ship! But I do think you deserve to know when someone's doing something excellently, and Nichole is not only a talented artist (she creates all the stamp designs by hand), but she's a businesswoman who has thought through how to best serve her customers. Kudos, Nichole, for bringing such a great product to market!!
The Gift That Will Keep on Giving
This is the stamp set I received from Shelli Gardner, president of Stampin' Up! Just so you know what kind of company culture you support when you purchase SU! products, let me quote a bit from the letter that came with this gift:
"As we work together to share what we love with others, I recognize your hard work, dedication, and enthusiasm. I hope this set brings you happiness and reminds you how very much we appreciate the time you spend with us and the time we spend with you." Wow, huh! I'm glad she is guiding the company, because this communicates to me that she values people and invests her energies accordingly.
The name of the set is Time Well Spent, and the 2 sentiments in it are "Time with Friends is time well spent" and "Too much of a good thing is still a good thing." Then there are 5 different sized flower images, several leaves, a stem and a butterfly.
This is the first attempt that came of my experimenting with it, and it was a birthday card for a new friend. My idea was to accomplish something similar to the spotlight technique that I did with the pumpkin set last month here. I don't think I quite pulled it off though. Still, I had fun and the recipient liked it. That's really all that matters, right?
So, pull out some stamps this holiday weekend and focus on someone you can encourage with a card. That was really the point of Shelli's gift, and I intend to live toward that end, because what we do to invest in each other really is the only gift that keeps on giving.
Happy Thanksgiving--I'm giving thanks for you!
Tuesday, November 20, 2007
Babies and more Babies...
Several people in my life have had babies this fall, and I've struggled to send cards because I didn't have a stamp set to use for acknowledging this happy occasion. I recently bought Fun and Fast Notes, and today I had the time to attempt to make something I'd like.
This one I like. This isn't photographed all that well, but the colors are great together in real life. The baby BUGGY (did you know that southerners call the thing you push through the grocery to put your items in a BUGGY?!? NOT!) is one of 8 images, and it's sweet, huh!
This second one didn't photograph well either, but I'm showing it to pass along to show you that if you come up with a layout you like, duplicate it while you already have the stamps out! I happened to need 2 baby cards and I really should be figuring out what we're going to have for dinner instead of making more cards or typing this post, BUT my point is if you make multiples then you'll be ready for the next time you need such a card.
#1 son just asked what we're having for dinner, so I'd better go figure that out. I have tomorrow off as well, so be looking for another post...it'll contain BIG BIG NEWS, so don't miss it!
Monday, November 19, 2007
Don't Break the Chain...
Ever received a chain letter in the mail? Well, I signed up to be part of a group of women who are mailing cards to each other, one card's design serving as fuel for the next. I've had the card for a few weeks, but I never intended to break the chain. So, here's my card.
Let's start with the card that was sent to me. I was inspired by the little bit of bling on the tree, and the swirls behind it. Evidently, Season of Joy has been wildly popular among customers and demonstrators, and this card was made using that.
So was mine. I never like wasting anything, and so the focal point of this image should look familiar to those who read this blog regularly. But I also wanted to use a different sentiment--the word "Peace" from Peaceful Wishes. It was a little tricky, since the company doesn't make markers to go with the In Color collection, specifically Blue Bayou that was used here, but I'm pleased with the results.
Wish I had more time for blah blah blah, but I need to get to work. Enjoy! I hope my recipient does...
Friday, November 16, 2007
Grocery Shopping's Done, So...
I couldn't resist putzing with the last layout in order to make use of the gorgeous Wintergreen designer paper. When I made the first card (above), I didn't have the Peaceful Wishes set, so my ornament was suspended in snowflakes. Well, since I had the set just laying there on my desk and I hadn't used the branch in my other design, it only seemed right to give it a try.
I used Always Artichoke CRAFT ink, and embossed the branches afterwards. Then I went in with River Rock classic ink and stamped again. (Tonight I'll tell my ladies to do it the other way--much easier!) The falling snowflakes had to stay, but I'm a big stickler about proportion, so I had to use Snow Flurries instead of the larger ones from the original design. I'm pleased--what do you think?
Since I liked both designs, the gals will get to make 2 of the original and one of the revised. I wish I could keep things simple, but it's too fun to use all the tools at hand for cool results!
If there's time, I think I'll let the gals try making the snowflake. Sandra's a fast stamper, so I'm sure she'll have time. Off to do a few more things to prepare. Don't you wish YOU were coming tonight?
12-minute Card
I'm humming the Beatles tune, "I get by with a little help from my friends" because this card is yet another CASE from a blogger by the name of Lindsey, who has a great blog called (appropriately), Stampin' with Linz. I LOVE red and white together, and I liked the use of white embossing powder to make the snowflakes pop on the red card stock. It also looked quick and easy, which is also the theme for today!
I'm timing myself because, as a demonstrator, I need to know how much time it takes for me to make and cut supplies. And since "time is money", I need to know if this endeavor is not only fun, but profitable. Twelve minutes--that makes me happy.
One more to go, and I'm using one I posted about here. I may change up the color combo, but only if I do will I post again before this evening. Groceries must come in this house, or things will be quite desperate this evening when the boys are forced to figure out what to eat while I'm hosting my stampers! I have to open at Starbucks tomorrow morning, but I hope to post something else this weekend. Thanks for stopping by!
Imitation is...
the sincerest form of flattery, right? When you have a stampastack in 7 hours, it is! Debbie Olson is an AMAZING card artist, and I was struck by the simple beauty of her card on her blog on Nov. 9. (Thinking Inking) This is my take on it. I don't have brads, I don't have very vanilla ribbon, and I don't have the cute little "Merry Christmas" sentiment she has, so I improvised. I'm not sure about the eyelets, so the gals will have the option tonight, but I like everything else.
Peaceful Wishes is the set being used here, and I'm going to have to get it. Thanks to the kindness of fellow demonstrator Diliana Worster, I have it on loan for the day!
Stay tuned for 2 more cards!
Peaceful Wishes is the set being used here, and I'm going to have to get it. Thanks to the kindness of fellow demonstrator Diliana Worster, I have it on loan for the day!
Stay tuned for 2 more cards!
I Can Make It Snow!
I really like snow, but I don't like the cold that's required to produce it. Well, well, well, someone's come up with a way to satisfy me! I found this via my Texan friend Lydia's blog (bet she doesn't see much snow either!) She didn't come up with the design--a NEWBIE stamper named Donna Mills did! Here's the link for how to make it. Snowflake Tutorial
Believe it or not, it starts with two simple tag punches. Punch the small one first, then punch the larger one on top of it to create this little "window". Line them up, glue them on mulberry paper. Layer four more at an angle on top of those, and you get the above flake!
The only thing I can't decide is if I like the single layer or the double layer flake. Leave me a comment with your opinion! I was going to have the gals make these tonight for one of the card designs, but at 6 min. to finish one layer, it's not practical.
Thursday, November 15, 2007
Great Times, Great Mail!
This sentiment came via Mr. Brown this afternoon, and it is a perfect statement to express what I experienced yesterday. Last night I had the privilege of introducing 8 people to the art of rubber stamping. By introducing, I mean that they had never stamped before ever. We had a wonderful time getting acquainted, and I was so proud of how they dove in and tried something new. Adults are not good at doing new things, especially creative things. They think they're going to look inept, so they don't try. Not this group! They created some beautiful cards and found out that beauty can be made with paper, ink, and stamps! I look forward to stamping with them again.
So, this is the new rubber that arrived today! SU!'s founder, Shelly Gardner, sent this as my Thanksmas present for being a demonstrator. Is that great, or what! I think it's so kind of them to communicate their appreciation for what we do representing SU! in this way! I'll have to set it aside until the weekend, though, because I have cards to design and paper to cut for tomorrow's Christmas Card Stamp-A-Stack. You'll be the first to see what I come up with, though. I do think you'll be able to get your own set in the new catalog, which will debut Jan. 1, 2008.
One last photo to share and then I have to go. This is what I demonstrated last night at the workshop. Those in attendance were wowed by the way glitter can add shimmer to a project by using everyday, ordinary packing tape! If you want details, leave a comment. There will be lots posted tomorrow, so check back here often.
Tuesday, November 13, 2007
Workshop Creation
I was feeling quite pressed for time last week, but I knew I needed to get a card created for the workshop I have tomorrow night. (Thanks for all who prayed and sent well wishes. Lots of rest last night helped, and I'm feeling better.) These soft colors really convey the beauty of the season and peacefulness to me. Of course, Season of Joy has become one of the sets I turn again and again for its great versatility, and this card was no exception.
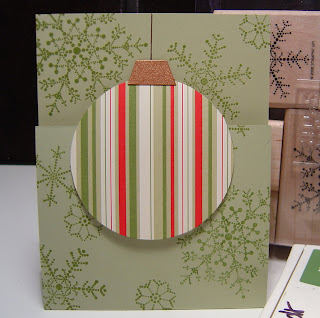
The driving force for the color scheme was the Wintergreen designer paper. I"m telling you, girls, if you don't utilize designer paper, you're missing out! The colors in them coordinate with the solid color cardstock, and this makes designing so simple! The base for this card is Sage Shadow, a color I haven't worked much with. I know it pairs beautifully with red, though, so expect to see another card using this soon. Always Artichoke, Certainly Celery and Whisper White coordinate to create a very soothing, elegant card.
Just a reminder: SU! is running a great sale this month on ALL the designer paper packages. Buy 3 (36 12"x12" sheets total) for $9.95 each, and get a 4th FREE! It's a great time to give this a try, or stock up for scrapbooking or Christmas card making. It's not too late to make your cards this year! If you'd like me to contact you about this offer, leave me a comment with your email address.
Have a great day! Mine's going to be busy--working, workshop prep, Michael's piano lesson, dinner. Love connecting with ya'll again, though!
Monday, November 12, 2007
I Owe You
...an apology! So sorry that it has been 8 days since my last post! Life here got a little crazy--working and preparing to go out of town for the weekend--and now I'm in the midst of a very busy week...again. I'll try to post more this week, but it will definitely be in the evenings. I'll also do my best to be more regular, because I miss being creative, and I miss interacting with you. Thanks for your understanding.
On to some cool pictures. This weekend I was in IL for a SU! meeting with 100 other demonstrators. I was the one who came from the farthest away, and it was well worth the time and energy. I made 30 swaps to exchange with those in attendance, and this received rave reviews.
It's a CASE of a travel tissue holder, the template for which was so generously put forth on the internet by Julie Ebersole. If you email me, I'll send it to you! What's great about these little beauties is that they're fast and easy, and they have a WOW factor. It all begins with a 4"x11" piece of cardstock. I chose, since I had 30 to do, to wheel my design onto the paper instead of stamping separately that many times. This wheel is called Petals, and it coordinates with the popular Polka Dots and Paisley set. Simple color coordinating of pale plum paper and perfect plum ink. The travel tissues are inexpensive--8 for $1.50. I removed them from the package and formed the case around them. The cool thing about this is that it's refillable!
At the meeting there were many demonstrators who brought displays of their cards and 3D projects. This one in particular caught my eye.
Odds are pretty good that you'll be giving someone a CD for Christmas. This is a great festive way to package it! I like that it doesn't require a box, but there's still the element of surprise for the recipient. This was just one of the many ideas I saw while I was there. I was busy chatting and swapping, though, so I didn't take many pictures.
Here's one more for the day: I used to be such a traditionalist about the holidays. While I still think red, green, and white are classic, this one with its soft color combo caught my eye. This is certainly celery with rose red, with a touch of almost amethyst. I also liked the layout.
Tomorrow I'll post again, I promise! I have a workshop I'm co-hosting with Melissa on Wednesday, and before I left town I came up with a cool card. (Mojo under pressure!) It'll show you just how some pretty paper changed my opinion about Christmas colors. It won't have any pink in it though--just can't go there, girlfriends!
P.S. Please remember me and say a prayer if you're a praying person. I came down with some sort of virus while I was gone, and it has me nauseated today. I can't afford to get laid low by this--too much going on this week. Thanks...
On to some cool pictures. This weekend I was in IL for a SU! meeting with 100 other demonstrators. I was the one who came from the farthest away, and it was well worth the time and energy. I made 30 swaps to exchange with those in attendance, and this received rave reviews.
It's a CASE of a travel tissue holder, the template for which was so generously put forth on the internet by Julie Ebersole. If you email me, I'll send it to you! What's great about these little beauties is that they're fast and easy, and they have a WOW factor. It all begins with a 4"x11" piece of cardstock. I chose, since I had 30 to do, to wheel my design onto the paper instead of stamping separately that many times. This wheel is called Petals, and it coordinates with the popular Polka Dots and Paisley set. Simple color coordinating of pale plum paper and perfect plum ink. The travel tissues are inexpensive--8 for $1.50. I removed them from the package and formed the case around them. The cool thing about this is that it's refillable!
At the meeting there were many demonstrators who brought displays of their cards and 3D projects. This one in particular caught my eye.
Odds are pretty good that you'll be giving someone a CD for Christmas. This is a great festive way to package it! I like that it doesn't require a box, but there's still the element of surprise for the recipient. This was just one of the many ideas I saw while I was there. I was busy chatting and swapping, though, so I didn't take many pictures.
Here's one more for the day: I used to be such a traditionalist about the holidays. While I still think red, green, and white are classic, this one with its soft color combo caught my eye. This is certainly celery with rose red, with a touch of almost amethyst. I also liked the layout.
Tomorrow I'll post again, I promise! I have a workshop I'm co-hosting with Melissa on Wednesday, and before I left town I came up with a cool card. (Mojo under pressure!) It'll show you just how some pretty paper changed my opinion about Christmas colors. It won't have any pink in it though--just can't go there, girlfriends!
P.S. Please remember me and say a prayer if you're a praying person. I came down with some sort of virus while I was gone, and it has me nauseated today. I can't afford to get laid low by this--too much going on this week. Thanks...
Labels:
3D projects--cd wrap,
card,
Travel Tissue Holder
Sunday, November 4, 2007
Sketch Challenge
Jen del Muro at i{heart}2stamp posts a sketch challenge every weekend, and yesterday I actually had time to participate. You can follow the link above to see it.
I'm pleased with how these 2 came together. I needed a sympathy card and a general card, so I turned to the set I always end up with in my hand for these kinds of cards--Art of Life. It's retired, but it just has the right somber attitude (if a stamp can have an attitude!).
I liked the different layers of this sketch, particularly for the sympathy card. The lady I'm sending it to is my old neighbor whose husband passed away. By old neighbor, I mean the family we lived next door to from the time I was a toddler until the middle of 4th grade. My parents have kept in touch with them even though we have not lived next door for almost 30 years. Why? Because Walt and Val Gerdom were good neighbors.
They were the kind of folks who sat out on their front porch after dinner and were tolerant of two little girls who would come over and want to chat. Walt tried to teach me the multiplication tables, and my younger sister was the one who could give him the answers before I could. They were also good neighbors for not going ballistic when my sister took scissors to all the tulip heads in their front flowerbeds. They looked the other way when we cut through their back gate to visit the girls behind our house, and it's because of Val that I eat pecan pie today.
Walt was 80 and Val is 78. They still were living independently, even though Walt had the beginning stages of Alzheimer's, and Val had lost her eyesight several years back. So, while she won't be able to see the card, I like that perhaps she'll feel the different layers as her son Greg describes the card to her and reads what I write. I hope it'll bring her some comfort to know that I still remember her and her husband fondly.
This is going to be a busy week. I work every day but Friday, and we're going out of town for the weekend. I hope to stamp some on Wednesday, but we'll have to see what happens with laundry! I know ya'll can relate!
Saturday, November 3, 2007
Card Assembly--Bustin' a Move!
Well, today was the day! Angela, Paula, Sandra, and I gathered in my basement and cranked out a bunch of Christmas cards!
Here's a picture of the ladies, hard at work. Do you know how challenging it is to photograph stamping? There was such rapid moving going on--hands flying from ink pads to paper--that I have blurring in the photo! HA!
Angela's brand new to stamping, and she took on this project because she wanted to involve her children in the Christmas cards this year. So, her oldest daughter, Kaelin, came along and began working with her SU! Kids Markers to color the 30 images of Mary, Joseph, the baby Jesus, and the sheep. Her younger brother, 6-year-old Jake, and her three-year-old sister Payton are all going to get a chance to do some coloring, and Angela intends for them to sign their work, just like all artists do. Isn't that going to make a great family memory?
Sandra's the speediest stamper in the group. She also has a great analytical mind, so she came with a diagram of what she was going to assemble, already complete with measurements for each piece. She also had her pictures back from the printer already, so she left with her 20 cards completed. (She's quite the trooper, since she had 3 wisdom teeth out on Thursday!) Isn't her daughter adorable? And the design is all coordinated with red matting. See the great little detail on the greeting? That thin strip of paper was left over after I cut something, and she immediately said, "Don't throw that away." She incorporated it into her design, making the greeting look like a present! Genius!
Paula liked the design I came up with, and so we set about replicating 60 for her. She will be using a 4x6 photo instead of the 3.5x5 that I used, so we resized her Dashing designer paper pieces to 3x4. She got 12 out of each sheet that way, using only 5 sheets of her package of 12! She's going to attach a red bow above each greeting, adhere the photo, sign their name, and they'll be ready to go in the envelopes! Her daughter Laney is going to stamp something fun on each envelope.
Ya'll, we even had time for a leisurely lunch and everyone went home by 1. We had a great time, and were productive. If enough of you are around Thanksgiving weekend, I'd be willing to host another group! I'm putting an order in to SU! on Nov. 15 or 16, so think it over. It's not too late!
Friday, November 2, 2007
Present Card, Take 2
Good afternoon! I was running errands this morning and saw these beauties along the way. Oh how I love fall! Our trees are really stressed and the leaves are slightly shriveled, due to the severe drought we're in the grip of. But what amazed me when I looked closer is that, despite all they're going through, the tree's leaves are still turning color and giving a glorious display! Now that's what I call praising the Creator. I should take a lesson...but I digress.
I got home as soon as I could from my outing so that I could do more crafting. I wanted to take another whack at that present card, so that I could cement how I made it in my head for future reference. Good thing I did! Gals, I gave you the wrong dimension on the top present this morning--chalk it up to not having the sleepies out of my eyes while counting those little 16ths on the ruler--but the width is 1 5/8", not 1 7/8".
For this version I added a gift tag. I like how this makes it even more clear that these are presents stacked high for that special someone. I also created the second present flap by using a strip of double-sided designer paper (I used the Cerise set for this card) instead of card stock. It added color inside the card as well!
I have been poking around the internet again and I have a technique I want to try, so I'll sign off. Happy Friday...hope you get to stamp this weekend! I'll post pictures from the Christmas Card Assembly Party tomorrow sometime.
Stamping on the brain
I shared with you recently about waking up with a layout for a card in my head. Well, it happened again this morning, and thankfully I had time to experiment to figure it out. No Starbucks for me today, so I'm playing!
See, I saw this card at Lorri's blog, Dream Big. That's what started it all. Isn't it cute? I think it's really quick and easy and adorable. Here's what I turned it into!
SU's fabulous line of designer paper is the star here. The layout was the most challenging part of the card. I started with a regular sheet of card stock (8.5 x 11) and cut it lengthwise at 4.25". Then I started figuring out how I could create scores so that I could achieve the flaps.
This first one is 1 7/8" wide and 3" deep, which means the score line is at 1.5". There were extra pieces on the sides that had to be removed in order to make the "present" stand alone on the top.
The second flap is actually attached and not part of the original width of the card. When I got to this point and realized that I didn't have the width necessary to create a flap, I just looked around for a scrap and used that. It's 5 1/16" long, scored at .75" and it's 2" wide.
I wanted to make sure this would fit in a regular A2 envelope, so it had to be 5.5" in length. From the bottom of the second "present" to the bottom of the card is 4" and I scored it at 2".
The sentiment inside and the Merry Christmas at the bottom are from Many Merry Messages, which is a fabulous, versatile set to have in your stamping stash. The ribbon at the top is attached with a glue dot and the others are scraps of red gingham and mellow moss 1/4" grosgrain from SU.
I really need to get to the post office, the library, and clean my craft room, so a shower is the first order of business. What a fun way to start the day though! Hope you enjoyed this. Let me know if you CASE it! This layout would work for a birthday card as well!
Subscribe to:
Posts (Atom)