Wednesday, September 30, 2009

Got Gift Cards? I Have Holders!

The most common present that many people opt to give these days is a gift card. They're great to receive, but their presentation is lacking. As pretty as the card may be, it's still just a card. Sometimes it doesn't seem like much when you present it. It's not the gift card's fault; it just needs a little help to be special. Enter the gift card holder.

There are about as many variations on this kind of packaging as their are crafters, so I had plenty of inspiration as I was casting about for ideas. These are three I've come up with so far, and I'm putting together a class for anyone interested in having a stash of these on hand. I'd love to partner with you to put a date on the calendar to provide you and your friends with these unique items!

The first one is simple, yet sporty and fun! It's a quickie too, which is sometimes just what you need. It uses a fantabulous color combination of Baja Breeze (yes, I know it's retired, but I love it, so you know how special you must be if I'll share my hoarded stash for this project), Tangerine Tango (again, it's retired, but I don't care), and So Saffron. Love it! The little party hats seem to dance on the cover (thank you, Diana Gibbs for the idea and colors), and they're popped up on Stampin' Dimensionals on top of circles punched with the .75" punch. A slit punch helps keep the card closed and the gift card in its place. Here's a shot of the interior: the gift card is just held in place with mono adhesive.


The second card features a Christmas theme, utilizing the ornaments from Delightful Decorations. This holder goes together so quickly, thanks to the ornament punch that coordinates with the set! A belly band holds the holder together and the card is tucked away in a pocket inside. There's even a place to write a little message! So cool. I learned how to make this at a demonstrators gathering hosted by Glenda Travelstead.


I saved the best for last! Isn't this purse CUTE!! Dawn Griffith posted a tutorial on her blog, and I want to make sure she gets the credit she deserves.
The interior has a clear envelope that has been cut to size to hold the gift card securely, and the bottom flap is perfect for a little message to the recipient. It's held closed with a very small magnet. How's that for GIRLY?

I may add a few more to this repertoire, but I hope you are excited by what you've seen and want to get some friends together and make these! The cost of the workshop will be determined by the number of holders each person wants to make.

Contact me through the comments and let me know when you'd like to schedule this fun time of crafting with your friends.

Tuesday, September 29, 2009

Shop the Clearance Rack at Stampin' Up Online!

What great news! Stampin' Up! has decided to offer retired items they have a surplus of at up to 80% off! Click on my Shop 24/7 button in the upper right to be taken to my business website, and then click on the Shop button there to go directly to the store. You'll get the same pricing I would, since you're using me as your demonstrator. Check it out--there is some great stuff there!

Wedding Present


(This was supposed to post while I was gone last weekend, but I forgot to schedule it. Enjoy!) My cousin closest in age to me on my dad's side is getting married this weekend, and as you read this, I'm on my way via car to bear witness to the nuptials. Because funds are tight these days, my gift is my presence, but I didn't want to show up completely empty-handed. So I made these simple monogram cards using the color scheme from the wedding.

The base is Whisper White and the medallion is stamped on Real Red, matted with Basic Black. I hope they'll put them to good use as thank yous for all the wonderful gifts they'll receive.

Trip Postscript: Driving 1600 miles in 2 days to attend this wedding might be considered by some to be insane, but I'd do it again in a heartbeat. Time with family, whatever lengths you have to go to to have it, is time well spent, and you don't get another chance to experience some of life's events.

We were out of the car only about 3 more hours than we were in it, if you add it all up, but in that brief time I:
*saw my cousins, my niece and nephew, my aunts and uncles, my great aunts and uncles
*chatted with friends who met us along I69 at Starbucks (where else?) for late night coffee (decaf)
*listened to my niece play the few notes she knows on the flute she's learning to play
*made a spontaneous stop at a bakery on the way to the wedding and had great treats
*talked with my cousin about the narcissism of today's culture while speeding along I65
and witnessed a milestone event.

The happy couple is enjoying Hawaii, and I'm back in town, planning this month's Stamp-A-Stack and gearing up for the holiday card making season. And a good time was had by all!

More Birthday Cards

I have a few things to show you, but I want to hold off just a bit longer. I realize it has been awhile since I posted, so I thought I'd tide you over by giving you some card eye candy. This card is from my friend Connie in IL. She got into card making several years after I did, and we spent good quality time while I lived there crafting together. She has used her talents to support her local crisis pregnancy center by making cards for them to use, and she also makes cards for her church to send out to those who are ill or shut-in and can't make it to services. Don't you love how card making can encourage others? Thanks, Connie, for encouraging me on my birthday!

The other handmade card I received is from my friend Elisabeth, who lives in England with her family. She just moved there last year, and has found stamping to be a wonderful way to meet new people and help them nurture their creativity--some of whom never thought they had any! She has limited space and limited supplies, but such a beautiful way of making the most of what she has. She knows how I love earth tones. Thanks, Elisabeth!

Wednesday, September 23, 2009

Circles for a Sweet Baby and Water Water Everywhere!

My dear friend Aminah, whom I've known since she was in college and was Michael's babysitter, and her husband Nate had a baby on the best date of this year, 09-09-09. (How cool is that!) Their sweet little girl's name is Miriam Hope, and she's quite a cutie! I'd love to cuddle with this baby and sit on the couch with her mama, but I live 800 miles away from this dear family, so the best way I can celebrate with them is to send them a card.

When I spoke with Aminah before she had the baby (they didn't find out the sex!), I casually inquired about the colors of the nursery. She said brown, green, and orange. Soothing earth tones. Love 'em! When I received Miriam's birth announcement, there she was, laying on a blanket that had circles in the pattern. I LOVE CIRCLES.

So, I got out all my circle punches this afternoon--1.75", 1 3/8", 1.25", 1", .75", and .5"--and started making circles in Chocolate Chip, Pumpkin Pie (perfect for a little punkin!), and Old Olive. I layered them all on Very Vanilla to create a one of a kind background. Perfect!

Then I started playing with an idea that I'd visualized in my head. It involved chipboard frames--3 of them to symbolize Mommy, Daddy, and Baby. I inked them up in Chocolate Chip with my reinker and a sponge dauber and set them aside to dry. What sentiment to use? It needed to be small, so I pulled out a retired set of sayings from the Hostess line and came upon "it's a girl". Classic and to the point.

The final product has several more layers and measures roughly 4.25"x6ish". I mounted everything on some natural cardstock I'd bought at a chain craft store (it was surprisingly thin and flimsy but served the purpose) and it's ready to be mailed! I hope they like it. It was made "just for them".

Tuesday, September 22, 2009

A Beauty from a Friend

My friend and fellow demonstrator Nadine Amy sent me this GORGEOUS card for my birthday! Isn't it stunning?

The layout is a tri-shutter, and it has many panels to decorate. Nadine used the Cottage Wall DSP, which combines Old Olive, Orchid Opulence, and Rich Razzleberry. The butterflies on the front were created using the Beautiful Butterflies Sizzix Bigz diecut. Two half pearls from the Pretties kit create the body.

The interior showcases more of the DSP and flowers from Embrace Life accent the smaller areas. She punched those with her 1" circle punch and matted it on OO using her 1.25" circle punch. The sentiment "just thinking of you on your birthday" is from On Your Birthday, a 12-piece sentiment set. Accenting the message is the butterfly from Great Friend, stamped in OO and mounted with Stampin' Dimensionals.

This made me feel so special! Thanks a bunch, Nadine! Who will you bless with a handmade card today? I'm off to make a baby card.

Monday, September 21, 2009

Got Elves?

I love the idea of Santa, mainly because he has ELVES. Consider how much you could accomplish each holiday season if you had a vast army of people who would do everything you'd ask them to with smiles on their faces! I also wish for elves about this time every year because this is when I begin to think about making Christmas cards.

Each year the thought of making Christmas cards evokes two reactions in me. Part of me loves the idea of expressing how much I cherish my friends and family by giving them a handmade card, while the other part of me can't figure out where I will find the hours and hours (and energy) it will take to make them.

Well, this year is going to be different. Why? I've discovered SU!'s Christmas Jingle Simply Scrappin' Kit! What does a scrapbooking kit have to do with Christmas cards? Wait and see!

The kit comes with 8-12"x12" sheets of textured card stock in four colors: Very Vanilla, Real Red, Old Olive, and Chocolate Chip. Also included are 6-12"x12" sheets of double-sided Designer Series Paper that coordinate with these four core colors. The best part of the kit is the 6 sheets of self-adhesive stickers. ALL that for $20!

So I decided to get my hands on one of these kits and see how many cards I could create using these elements. I made 24! Ready to see my creations?


These first 8 cards were designed to be made twice. (Double click on the pictures to see each foursome in more detail.) With 2 sheets of every sticker page, this is accomplished painlessly with some simple planning, leaving plenty leftover for 8 more. I cut the card stock into 4"x12" strips, then cut those down by 1" so that I would have traditional size cards that would fit in A2 envelopes.


Here is the second set of eight. I loved how quickly and easily these came together. What's even nicer about this whole process is that there's very little cutting or stamping involved. I used several sentiments from various Christmas stamp sets I have, but the first eight cards don't have any stamping on them at all! This kit has plenty of supplies!

So, I'm offering what I've done all the work of planning out to you. I will cut all the elements and all you'll have to do is assemble them. In approximately 2 hours' time, you'll have 24 cards ready for mailing or gift giving. The fee for this will be $35. If you purchase multiple kits, the price will be $30 each. I will supply ribbon and envelopes as part of that $35 fee, so please keep this and the fact that I'll be doing all the prep work for you in mind as you consider the price.

Those who host a group of at least 3 friends to make these cards together will receive something special from me--a handmade by me container to hold 6 of these cards for gift giving. You can let me know of your interest in hosting one of these events by contacting me via email (jenn.nahrstadt@gmail.com) or by leaving a comment with your contact information. If you're looking for a photo card idea that's a step above the Walmart printout, I have a kit available for this as well!

Just consider me your card making elf this year!

Saturday, September 19, 2009

What Is It They Say About Elephants and Their Memories?

Is it true or is it a myth that elephants have good memories? As in, they remember things. I'm not sure, but this elephant seems to have a good memory for remembering birthdays of his friends, and being ready and willing to par-tay!

This card for today's Stamp-A-Stack features a bunch of retired stuff. Retired stuff still works, y'all, so it's getting put to good use! The set is Wild About You, the DSP is Cutie Pie, and the card stock is Purely Pomegranate. I loved this color {sigh}. This is a pretty straightforward design, but the little details of the ear popped up on a Stampin' Dimensional and the layered party hat in coordinating colors (from the current set Party Hearty) make it more special than your average greeting card from the grocery.

This card was originally intended for our monthly card making night at the Ronald McDonald House. I have a second that I'll show at another time, closer to when we go. The census at the House is always changing, and this month's residents are mostly male and older teens. At the advice of a fellow volunteer who is at the house weekly, we're postponing until there's a group there that might enjoy crafting more than this demographic. You gotta know your audience, and the guys just don't have the love for crafting! So some of the supplies will be put to good use this weekend at my house instead.

Happy weekend to you! My folks arrive from IN for the week, so we'll be getting some good face time with them in the next 7 days. Someone in our house is having a birthday, so we'll be going out to dinner and having some chocolate cake! Be sure to remember those in your life with birthdays. It really does mean more than you think to get a card in the mail.

Friday, September 18, 2009

Wedding Medallion

This Medallion background stamp is more and more fun to use each time I play with it! If you haven't seen the first post I did using this stamp, click here. Earlier this week at work, a partner commented that we should have a card for our district manager who is getting remarried this weekend. I told him I'd put one together, and this is the result.

I was influenced heavily in the design by this post by dberry on Splitcoaststampers.com. I really liked how she made the image look like a tile, and so I set out to put my own twist on it. The image is large--4.75" square. I chose Very Vanilla for the card stock and Soft Suede for the ink. I needed to be able to easily divide the VV in thirds, so I made my square 4 7/8". This allowed me to score at 1 5/8" and get the desired look. After I scored the square, I folded it and creased it several times to break down the paper fibers. Then I tore it apart. This left only the outer edges to distress with scissors.

I used some Soft Sky card stock from the InColor collection of 2 years ago (measuring 5 1/8" square) and attached both layers to a 5.25" base of Soft Suede. Old meets new.

Where to put the (from Kind and Caring Thoughts) was the biggest challenge. I thought about splitting it up and putting "Best" in the upper left corner and "Wishes" in the lower right corner, but I determined that keeping it all together was better. I split the message using my Stamp-A-Ma-Jig positioning system.

Most wedding cards feature designs that are feminine, so I'm pleased that this one seems to strike a balance and maybe even lean toward being more masculine.

Thursday, September 17, 2009

Can You Finish This Phrase?


Give a hoot, ______ ___________! I'm dating myself by making this mention, but I couldn't ignore what my brain gave me when I started this post. Use it or lose it, they say, and I want to keep my brain active for a long time.

So, that PSA aside, here's another card we're making at this month's Stamp-A-Stack. It features two sets, Season of Friendship and Owl Together Now. I don't own the second set, but my dear friend Lydia sent me some stamped images from this set almost a year ago for a project I was working on, and they've been flittin' around between my desk, storage, and another table in the craft room, and I decided they needed to be used.

I chose a color scheme from the 2009-2010 InColor Collection that has been popular this month--Rich Razzleberry, Dusty Durango, and Soft Suede. It really is a nice combination, and makes me yearn for true autumn, which begins officially in 4 days! It's pretty easy to see which colors were used where, and Very Vanilla is the top layer. I stamped the tree trunk from SoF in Soft Suede. Then I inked up the leaves stamp with DD and stamped it with once and then again after I remoistened it with a huff. I stamped off the RR leaves before placing them on the tree.

Then for the fun part! I used my InColor Stampin' Write Markers in the aforementioned colors to beautify my owl. Those attending Saturday will have two to place in their trees. Then I went to place the sentiment "you're a hoot!" on my card, only to realize that it was stamped on Whisper White card stock. What to do? I pulled out my light table and traced the letters with my SS marker! There's a .25" strip of SS across the bottom to ground the tree, and it looks more natural in real life.

In case you're too young to know, the answer to the fill in the blank question above is "don't pollute!" Have a great Thursday!

Wednesday, September 16, 2009

Wondering Where I've Been?

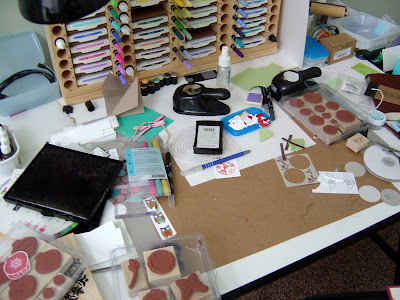
Well, it's not that I haven't been making cards. It's just that I reached a halting point because I couldn't work under the conditions I'd created! Check it out! This afternoon I determined that nothing else would happen in there until those spaces were cleared or at least organized. About 45 min. later, I had a clean desktop on which to photograph lots of cards I'd created just for you!


This first one is one I made last night, when I was completely unsure I would have 5 designs for this weekend's Stamp-A-Stack. I've had this card by Nancy Riley stored in my Google Reader favorites for 3 months, and it was just the inspiration I needed to get my creative juices flowing. (Props to Karen Giron for the sketch!)

The base is More Mustard and the 1.25" squares are from the Autumn Vine Designer Series Paper pack. This is retired, but I want to use up my stuff, so I'm making a little dent, 1.25" at a time! There are 8 total. The center square features more of the DSP, the larger pattern of the same one used in the smaller squares becomes the focal point matted on Chocolate Chip card stock. There's the sentiment "you're so thoughtful" from Absolutely Fabulous stamped in Chocolate Chip there amidst the leaves and vines. The ribbon is Sage Shadow .25" grosgrain, and I cut a slit in the fold of the card base to thread it through to tie a knot.

More cards forthcoming, now that they're all photographed! Posts for days! Thanks for sticking with me through the periods of silence.

Monday, September 7, 2009

Thank Y' Kindly

I've owned the Wanted set for 2 years, and every time I've pulled it out to make something, it has been a major challenge. Strike 1: it doesn't have a sentiment, unless you count "Wanted", which can only apply in so many situations with certain folks. Strike 2: I'm a city girl, so channeling my inner "country" is like visiting a foreign country where I don't speak the language. Well, hallelujah, I found a way to like this set before it incurred its third strike!

It all started when I visited Donna Moore's blog and saw this cool woven effect (second picture) done around a scalloped circle. I'd seen it awhile back, but had never investigated how to achieve said look. Now I really wanted to know. A quick email to Donna, and the answer was in my inbox!

It's SUPER easy, which is what I like--it makes you look all swank and stuff when you're really not! Simply punch a scalloped circle and attach a length of linen thread on the back. Come up between the top two scallops, count to your right three scallops, and wrap the thread behind the circle in the notch between the third and fourth scallops. Come back up 1 notch over from your starting point and repeat. Around and around and allemand left with your left hand...I mean keep repeating until you finish back where you started.

This became the starting point for this card. After I made a few more (they're addictive), I colored direct to rubber on one of the circular designs in the Wanted set with my Really Rust, Sage Shadow, and Chocolate Chip SU! Stampin' Write Markers. I stamped it on Very Vanilla card stock and punched out the design with my 1.25" circle punch. On the third circle, I used "thank you very much" from a retired set called Bitty Basics.

I didn't want to complicate the card with competing eye candy, so I chose a subtle piece of Designer Series Paper from the coordinating Outlaw pack (also retired--sorry, I'm trying to use up my stashes), and paired it with a piece of SS card stock. The base is 3" x 6" RR.

This is one of the cards we'll be making at this month's Stamp-A-Stack. Please leave a comment if you're interested in attending! The date is Sept. 19, from 10a-1p, at my house. Y'all come by now, y'hear!

Friday, September 4, 2009

Flight of a Three-step Stamped Butterfly

This card was inspired by this one that I saw online at SCS awhile back. I liked the color combination of Crushed Curry, Bermuda Bay, and Kraft. I also loved the little border along the bottom that Disneywed created.

This is how I reinterpreted the card. The butterflies abounded, dancing along the upper and lower borders. The Flight of the Butterfly set features 2-step stamping for the 'flies, and this time I combined 3 of the images to create my focal point. The solid image, inked in Sahara Sand (there is no Kraft ink available), was the base. I then stamped the dotted butterfly in CC and topped it with the dotted outlined image in BB. Can you say Stamp-A-Ma-Jig?! I never would have been able to line up those three without that tool.

I really like this whimsical card, and the sentiment from the set is perfect for wishing someone well, be it on their birthday or on some other occasion. You can purchase this set by clicking on my "shop now 24/7" icon in the upper right sidebar of this blog and have butterflies fluttering around your stamp room too!

Thursday, September 3, 2009

Expressing Sympathy

...is never easy. There just don't seem to be the right words. Such is the case I was faced with when I heard that 3 sisters I'd been in high school youth group with lost their mother to cancer last week. I knew I wanted to send them a card, but I also knew I didn't want it to be a dark, dreary kind of sympathy card. Yes, they would be grieving, but I knew they would not be grieving as those who have no hope. Their mother was a Christian, so they are comforted by the truth that she is in Heaven.

So I started with the A Walk in the Park Designer Series Paper and let its color palette dictate the design. The 5/8" wide So Saffron ribbon and retired double-striped Kiwi Kiss ribbon paired perfectly and layered nicely to create a great texture detail. I added a tiny scrap strip of Rose Red, also in the palette, so that all the hues were represented in the layout in some way other than just the DSP.

The sentiment is from God's Blessings, and it was the best I had in my stash. I wanted to use an oval, and I had seen on someone's blog, sorry to say I can't remember whose, that a corner punch could be used to create a scalloped edge! To do this, the base of the punch has to be removed, and it snaps off just as easily as it snaps on! I started at the top in the center and worked my way around. I really like it, do you?

The funeral was today, and Janet, Joy, and Julie have been on my mind all day. I hope the card's arrival will communicate my sympathy and care across the miles. I'd like to have been able to hug them myself, but I had to entrust that to my parents. Life is hard; we need to be there for each other, in whatever way we can. I choose to do so with cards. How do you express yourself when someone you know is in pain?

Wednesday, September 2, 2009

Multi-Hued Medallion

One of the hottest stamps from the new catalog is the Medallion background stamp. I've seen MANY cards using it, but my favorite is this one on SCS by BevMom. (I had a real thing for rainbows when I was in middle school, and I've never quite gotten over it.) This card spoke to me immediately, and I had to try my hand at it. I used nine inks, mostly from the Earth Elements color family, and applied the ink direct to the rubber using sponge daubers. Here's the list, for those who want to know: Cameo Coral, Ruby Red, Pumpkin Pie, Summer Sun, Old Olive, Garden Green, Baja Breeze, Not Quite Navy, and Elegant Eggplant.

Here's the completed card with the stamp. You can see that I left the center uninked. The circle is the same size as our newest circle punch, which measures 1.75". That's in the mail, so you'll be seeing some other card creations which incorporate the center and even highlight it.

We'll be using this stamp at this month's Stamp-A-Stack, which will be held on Sat., Sept. 19, from 10a-1p, at my house. If you'd like to host a gathering of friends at your house to do some great stamping, leave me a comment!

Tuesday, September 1, 2009

How Many Days Until Christmas?

Do you know? 115. That may seem like a lot, but it's not. Stop kidding yourself and start getting a grip on your holidays NOW.

One of the quickest ways you can do this is by viewing the new Holiday Mini catalog that debuts today. There are so many amazing cool things in it that I can't even begin to tell you about all of them! Here are just a few highlights:

*Great stamp sets for all the fall holidays--Halloween, Thanksgiving, and Christmas, *Simply Adorned, a new line of charms and chains for creating unique jewelry and home decor items,
*Sweet Treat Cups for integrating food into your cards and for making adorable Halloween treats that will be the talk of the neighborhood,
*a beautiful desk calendar with a mini stand and a gift box,
*an entire line of stamps and exclusive diecuts featuring the bears from Build-A-Bear Workshop,
AND
*the debut of My Digital Studio, Mac and PC compatible software for digiscrapping, photo albums, cards, and calendars!

Here's a first glimpse of a card featuring another special product from the Mini, the ornament punch! It pairs with a great set called Delightful Decorations, and it's going to make mass producing Christmas cards this season SO EASY! Also available are rub-ons designed to fit the ornament shape, so quick cards are what you can be all about this year. This card came together so fast! The silver elastic cord is offered in this supplement as well, and will not only make these ornaments look "real", but it'll make fantastic gift tag ties!

More to come in the days ahead, but don't wait! Go to my Demonstrator Business Website and click on Shop Now to view all the items online. From there, feel free to commence shopping. You'll get the same prices as if you ordered through me via the phone or email.

You can also download the new 2009 Holiday Mini catalog by clicking on either of the following links:

Low Res Version 2009 Holiday Mini

Full Res Zipped 2009 Holiday Mini

I'm tellin' you, the clock is ticking...