Showing posts with label Petals A Plenty TI Folder. Show all posts

Tuesday, May 10, 2011

I'm Back

Don't fall off your chair! I did so much housework yesterday that I find myself with a free afternoon (and I already know what we're having for dinner!). So, here's another of the cards I've made in the past few weeks but neglected to share with you. Until today.

This card is one I designed for a group of my stampers who want to make a stash of birthday cards to have on-hand. They call it a "sweatshop" when we make all these at one time, and there are 5 different designs that I grouped together for this event.

This one uses Soft Suede as the base, with a wide strip of So Saffron down the middle. I embossed a piece of Whisper White with Petals-A-Plenty TI Folder and colored the flower centers with the SS marker that matches the strip behind it. I used my Decorative Label Punch to create a spot for the sentiment. I punched that out BEFORE I embossed the card stock. I tried it the other way and it tore the paper. I popped up the panel with Stampin' Dimensionals and I really like how it creates a window effect for the sentiment.

The greeting is from Well Scripted, which is retired (but I hope it gets included in the new Big Idea Book & Catalog). This one comes together quickly, and when you're making lots of cards in one sitting, that's what you want!

Don't hold your breath, but I might be back tomorrow too!

Tuesday, March 8, 2011

Oodles to Share--Day 7: Another Sympathy SAB

Like I said, I'm NOT happy about all the sympathy cards I've had to make this year. This card is for a friend whose grandmother passed away.

I was inspired by Carol Valentine's card that I saw on Stampin' Connection. Sorry, she doesn't have a blog I can link to to show you the original. I used my Big Shot and Petals-A-Plenty Textured Impressions Folder to emboss the Wild Wasabi base. Then I took the branch image from Sweet Summer, a Sale-A-Bration FREEBIE, and stamped it multiple times around the edge of the Very Vanilla card stock. I pulled out my Marina Mist, Wild Wasabi, and Peach Parfait SU! Markers and colored the line art. I stamped the sentiment from So Happy For You in Early Espresso and matted the whole thing on Crumb Cake card stock.

The Peach Parfait decorative strip was made using the Scallop Trim Border Punch. It's such a delicate accent; I love this look and will probably use it again soon.

Well, that's the end of the week of Oodles to Share! If you'd like to get in on Sale-A-Bration, you have until the 31st to do so. Simply purchase $50 of merchandise--nothing is off-limits--and you'll get to choose an item of your choice from the SAB brochure. I'll email that to you when you email me with your order: jenn.nahrstadt@nahrstadt.com. Happy shopping!

Tuesday, November 9, 2010

Christmas Photo Card with Stand

I've had photo cards on the brain the past few weeks, and today's example is a throwback of sorts to a style card I made a few of earlier this year: the easel card. Those I've made before have been 4"x 4", but I wanted something that would accommodate a typical 4" x 6" picture. Well, this one does--almost. But who will miss the bottom .5" of most of your portraits anyway?

This really is quick and easy and can be gussied up or simplified, depending on the amount of time you want to invest. Since I would bet that a photo packaged this way will get more desk or mantle time than others that arrive this Christmas, I say the time spent is worth it. Again I have to give props to Penny Wessenaur who posted the measurements for the creation of this type of card. My design was inspired by Diana Gibbs.

The base of this 4.25" x 11" card, scored at 2.75" and 5.5" along the 11" length, is Always Artichoke. I was tired of Old Olive and Garden Green's just a little too green for my taste. I cut a second piece of 4.25" x 5.5" for mounting on top of the part that becomes the easel.

I ran a piece of Real Red through the Big Shot twice, once with the Top Note die and a second time with the Petals a Plenty Textured Impressions Folder. Poinsettias! I added a matting of Very Vanilla, 4" x 5.25". It just seemed too dark without it.

I stamped the little Merry Christmas from Season of Joy and added the swirls from that set on either side. I stamped the poinsettia in Versamark on Real Red and popped it up on a dimensional. The Victoria Crochet Trim was added on a piece of Always Artichoke card stock to create a sort of ledge for the easel part to rest against.

The best feature of this design is that it folds flat for mailing. This will mail without any extra postage added. If you'd like to see the other photo card options I've come up with for this season, just click here. Click here and here to see two others that could be used as photo cards. Happy crafting!

Friday, November 5, 2010

A Little Christmas Greeting Created by Accident

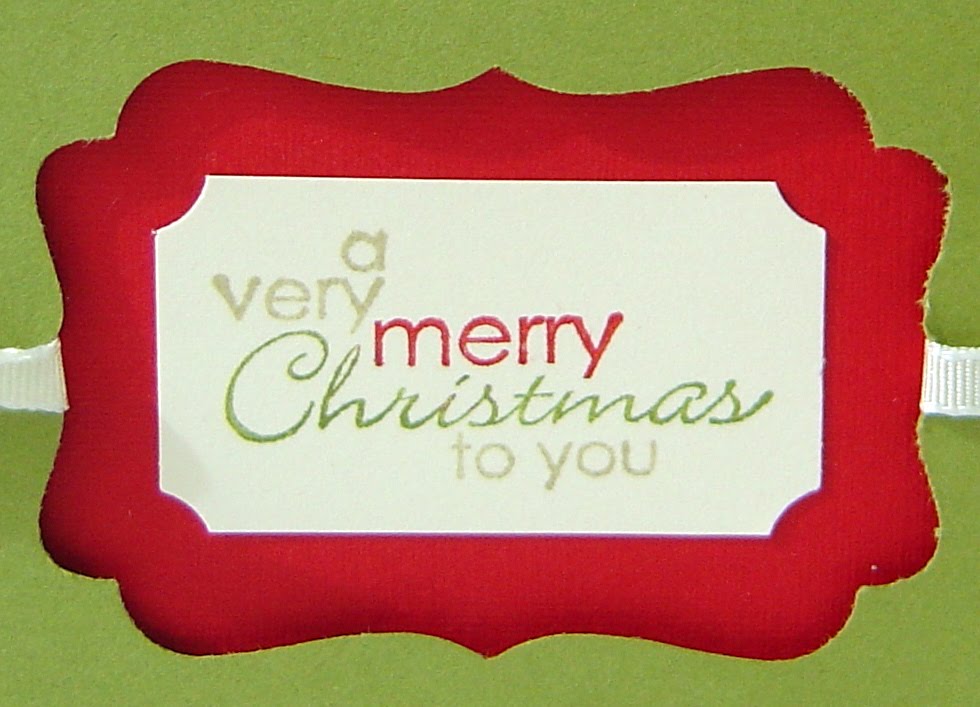
This card came together in the most roundabout way! I started out with a completely different focal image, but I just couldn't get it to look right. I had already cut the matting layers of Real Red and Old Olive and I didn't feel like wasting them. I happened to have my Decorative Label Punch sitting around on my craft table, and one thing led to another and this card layout came to me. (Just for the record, the base is River Rock and the large mat is Very Vanilla.)

The best part of this card, in my opinion, is the Petals A Plenty Textured Impressions Folder for the Big Shot that was used on the top half of the Old Olive piece. I used the debossed side and it just really is striking that way. I'd only ever used the folder to make an impression on an entire piece, and I really like how it makes a sort of border without adding another layer.

A side note: I am not an early adopter when it comes to trying new things, but I have to tell you that if I'd known how much I would enjoy the Big Shot die cutting machine back when SU! began offering it in 2008, I would've bought it immediately! It has enhanced my card making immensely, and it's super easy to use! Don't forget that the Mr. Santa in your life is probably looking for some idea of what to get you for Christmas. I can help him and he'll never have to leave his house! One phone call and he's DONE! Have him contact me at jenn@nahrstadt.com. He'll thank you, I promise!

The most accidental thing about this card's metamorphosis was the sentiment. It's from a retired set, The Best Is Yet to Be, and I inked it in the aforementioned colors directly on the rubber and stamped it on Very Vanilla. Then I pulled out my Designer Label Punch. It fit perfectly, but I cut off the rounded portions of the punched image before I changed my idea about using the original focal image, so I had this little ticket shape left. It fits so nicely inside the Decorative Label Punch, though, don't you think? The addition of the 1/8" Very Vanilla taffeta ribbon was also just a whim that turned out just as I'd hoped.

What have you created that turned out better than you expected? I hope you're finding time to do something creative during your busy days. It makes such a difference in my mental state, I confess. Have a very happy, if chilly (it's supposed to be in the 30s overnight here), weekend. Don't forget to turn your clocks BACK one hour Saturday night!

Friday, October 1, 2010

Quick and Easy Gift Card Holder

When that "most wonderful time of the year" comes around, many people struggle to know what to buy folks so they purchase gift cards. Nothin' wrong with gift cards, except there's not much to give. No package to unwrap most times, and just handing over what the store gives you to put it in can leave you feeling like you didn't quite do enough. Am I alone in this? I don't think so.

So, why not take a few moments and create some great packaging for these little cards? That's what I did the other day when I had this great scrap left over from SU!'s new Decorative Label Punch after I punched a sentiment out of a piece of Whisper White card stock. It made such a sweet frame that I began to wonder what sentiments might fit inside it. Since I had the stamps from Seasonal Sentiments, also from the current Holiday Mini Catalog, on my table, I pulled out the beautiful Christmas greeting.

The complete stamp says "Merry Christmas and a Happy New Year", but all of that wouldn't fit. So I used my Basic Black SU! Marker and just colored the Merry Christmas part and stamped it on a scrap of Real Red card stock. I popped the frame up on Stampin' Dimensionals and had a nice greeting...in like 2 minutes!

Then I reached for a scrap of Garden Green card stock. Conveniently, it measured 3.5" x 8.5", so I scored it at 4.25" and began to play around with the placement of the greeting I'd created. While I liked it, it needed something, and when I discovered what it was, I had to order it and wait until late last week for it to arrive.

"It" was the Petals A Plenty Textured Impressions Embossing Folder for the Big Shot. It creates a sea of poinsettias, perfect for Christmas! I placed just the front of the Garden Green card stock in the folder, ran it through the Big Shot, and was stunned at the difference that the dry embossed look made. I added some small Rhinestones to give some shimmer and more visual interest. WOW! I'm lovin' this, and so far it has taken, oh, maybe 5 min.

I used the now-retired Slit Punch to create a place for the gift card to rest inside, but Mono Adhesive or Glue Dots would work equally well.

See how easy it is to make a simple gift card a more special gift? The time to get started is NOW, friends, so don't delay. The highlighted items, and the card stock, are all you need to make this sweet holder. If you don't have the resources to purchase the Big Shot, let's work together to plan an event for you and your friends so that you will have a stash of gift card holders ready for holiday gift giving. This is just one of 4 different holders I've created that we can make in a private class. Contact me!